And so it was that I was inspired by the light up coffee table on hackaday http://hackaday.com/2014/02/03/ikea-led-table-mod-doesnt-lack-awesome/ today.
Inspired to write up a project that I'd completed about three years ago.
I'll start by saying that this was not my idea, I was inspired to make the coffee table after seeing a similar table on the make blog, http://makezine.com/2008/11/11/space-invader-coffee-tabl/
This coffee table uses what look like regular 4 inch tiles (slightly smaller than the average bathroom tile [6 inches]) to create a mosaic table top, Of course old 8 bit pixel sprites lend themselves very well to being made into tables from normal square tiles. it (and every other table of this type I've seen) takes the option to tile the entire table top, all the way to the edges -I decided to inlay my design in the centre.
The tiles I used were tiny in comparison (to the 4" tiles), I used mosaic tile mats, these are 12" square mats that have lots of 1" square tiles stuck to them in a uniform pattern of random colours, Black, white and two shades of grey.
The first step is to remove the tiles from the flexible backing and sort by colour, -the tiles can be just pulled off the backing -or the backing can be peeled off the tiles which is probably the more accurate way to describe the process.
Next you need to get yourself a LACK coffee table from Ikea, one of the little 50cm square ones, I chose to get a back one.
You can choose to assemble the table, or just work on the top on whatever work bench you have.
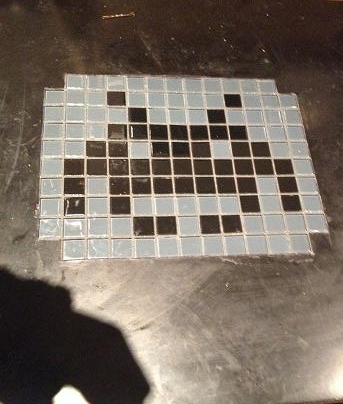
Start by arranging your tiles in the pattern that you want, you could either look at a reference picture (as I did) or make up your own design. include all the spacing in your tiles that you intend to put between them (grout lines).
Now mark out (using pencil) a square in the middle of the table, -your tile size, and your intended tile spacing will determine tile size -measure your layout! (I used a pack of tile spacers, but with a 3d printer you don't have to use the off the shelf ones -you could print your own, or you could use matchsticks etc...)
When you have your work area marked out start with a large "Stanley knife" (box cutter) and a metal straight edge and score the lines in the table top.
A good tip (unless you're very good with the knife) is to start in the corners working towards the middle, this means that you won't drag the knife on the table top that will be left.
It is unlikely that you will be able to cut through the top in a single pass of the knife.
Once you have cut out your pattern shape you need to pull it out. this will leave a hole in the table, and leave you with your first challenges.
The challenges are:
That the table is not solid, inside the table is a hexagonal arrangement of cardboard. you cannot set the tiles on that cardboard. not the thin air in the hexagonal gaps.
Secondly
That the tiles are going to be around 5mm (1/4") thick, but the table top (hardboard/melamine type material) is much thinner.
To get around this you need to firstly trim down the cardboard (either using the knife of a pair of scissors) -don't worry about being too careful of the height that is left.
Once you're done trimming down the card you need a can of expanding foam insulation.
carefully squeeze a portion of foam (don't fill because it expands) into each of the hexagonal pockets.
the foam will expand to fill the pockets and slightly dome out of the top of them.
Now using a large flat serrated knife (bread knife) cut the foam so that it's about twice the width of a tile under the surface of the table top.
Spread tile adhesive in a layer on top of the foam. and using the plastic tile spacers, ensure that the gaps remain consistent. push the tiles into the adhesive such that the tops of the tiles are level with the table top.
Now leave the table another day or two for the adhesive to properly dry.
finally fill in the gaps (grout lines) between the tiles with tile grout.
The table I used was a black Lack table. cost £5
The tiles I used were two packs of kitchen/bathroom mosaic tiles (cost £2 each) -and I have plenty left.
Expanding foam I used cost £2 per can, only a small can is needed (whilst there is some left, foam sets in the nozzle making the can useless unless you clean it directly after use)
the tile grout I used was a grey glitter grout.
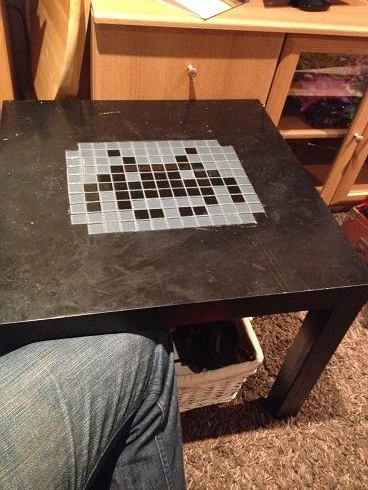
The final results are here: