So in the last lesson I looked at socket servers, I touched on a problem with these lessons that will now become very apparent.
Windows Vs. the world,
So, there is a problem here, windows sockets work different to the way that practically everyone else does it. I might come back to winsock later. and certainly if you want to learn how to program network aware programs on windows then those lessons will be useful. the changes are not insurmountable, but the code is not directly portable
The lessons that I'm writing here apply to Linux (every distribution to date) Unix, BSD Unix, Solaris, and I think MacOS.
Right now if you're reading this lesson thinking that you only have access to windows, then I suggest that you download VMware player, it's free and lets you host virtual machines on your PC, or Microsoft's virtual PC, or any other virtualisation software out there.
Then download a free copy of Linux to go with it. I'll leave it to you to decide which copy of Linux.
But I recommend Debian Linux, I wouldn't suggest using it as a desktop OS, (there are much more polished distributions based on Debian,) so I'd recommend it more based on what it forces you to learn more than because it's a really comfortable OS for a beginner to use.
Anyway, go somewhere else to figure out how to use Linux, when you've finished with learning how to do that, come back and learn how to make server software.
Libraries
There is going to be a whole heap of headers included in this program. these are needed because of the types of data that we're dealing with, and the sorts of data that we need, (that these libraries can provide).
Functions
We're going to be using the error function that was created in the last post so that we can provide some helpful errors in case of failure.
Program
So I figure the best way to do this is to go through the program line by line explaining what each line/block is doing then I'll paste the whole code at the end.
#include <stdio.h>
#include <stdlib.h>
#include <string.h>
#include <unistd.h>
#include <sys/types.h>
#include <sys/socket.h>
#include <netinet/in.h>
So first we've included all the libraries that we're going to use, it's a reasonably large list! I won't go through what every library does, it'd be pointless without the context provided by showing the code later.
void error(const char *msg)
{
perror(msg);
exit(1);
}
We setup our error function just as we did in the last lesson.
Then onto our main program.
int main()
{
int n, sockfd, newsockfd, portno;
First we're setting up integers that are going to be used for some error checking, we also set-up an integer to decide what port we want to open the server program on.
socklen_t clilen;
This line is declaring a variable called clien, it's data type is socklen_t.
tis is a bit weird, so far we've only looked at variable that are ints, chars, floats etc, socklen_t is a new variable type it's defined in the socket.h header file that we included.
struct sockaddr_in serv_addr, cli_addr;
now we're setting up a structured data type called sockaddr_in, this struct is defined in the library file
#include <netinet/in.h>
sockfd = socket(AF_INET, SOCK_STREAM, 0);
Now we get to the meat of the program, setting up a socket.
to set-up a socket first we use a return variable, (in this case the integer sockfd) then we use the socket function.
the socket function has three arguments.
the first of which is AF.
There are lots of AF types, (these are all defined in the header file socket.h) we're defining the socket as AF_INET this means internet protocol version 4. (notice I didn't say TCP/IP! just IP at this point).
we could also use AF_IPX to setup an IPX/SPX connecttion, or AF_APPLETALK to setup a socket for use with the apple talk protocol AF_INET6 for use with IP6 AF_ROUTE for using the software with the internet routing protocol.
(look in socket.h for an extensive list)
The next argument that socket function needs is instructions as to the type of socket it's going to be, in this case we say it'll be a stream, and we use it just like file streams, but we could have said it'll be raw.
and the final piece of information is the protocol used,
in this case we're setting it to 0, this means use the default type for the family and type of socket, (AF_INET and SCOK_STREAM default protocol is TCP) but we could always specify a different protocol.
Next we need to check if we're able to create a socket at all
if (sockfd < 0)
error("ERROR opening socket");
we check that sockfd (the returned integer from the socket function is greater than zero, (as a 0 or negative number would specify an error, -if there is an error the program is useless so we break off into our error routine.
if there is no error we carry on through the program.
bzero((char *) &serv_addr, sizeof(serv_addr));
Bzero is a function defined in the header string.h, it writes zeros to every location in the char array that makes up a string.
portno = 66;
serv_addr.sin_family = AF_INET;
serv_addr.sin_addr.s_addr = INADDR_ANY;
serv_addr.sin_port = htons(portno);
Now we need to set-up the data that's used in the structs for our socket creation.
again we're setting the socket family at AF_INET
Most machines will have more than one interface, this line :
serv_addr.sin_addr.s_addr = INADDR_ANY;
is telling the struct what address it will bind to, in this case the answer is any address
Then we set-up out port number, we do this using the function htons.
Htons is simply a function that converts the order or numbers.
the reason that it does this is because there are some machines on the internet that use big endian byte order, and some that use little endian byte order
If you consider how to store variables.
lets say we have a 8 bit number 00101101, and we need to store this 8 bit number, in a memory space that's only 2 bits wide.
we'll use 4 memory spaces, we'll number the memory spaces 1 - 4 with big endian number storage
1, - 00
2, - 10
3, - 11
4, - 01
so you see we read the most significant bits from memory location 1, then work through the memory locations until we reach the least significant bit.
little endian system store the least significant bit in the lowest addressed memory location. a map of the memory in this case would look like this.
1, - 01
2, - 10
3, - 11
4, - 01
the internet protocol specifies that big endian is the correct order, that means that anyone using a machine with an intel processor (for example) has to re-order the words that they speak in to devices on the internet.
if (bind(sockfd, (struct sockaddr *) &serv_addr,
sizeof(serv_addr)) < 0)
error("ERROR on binding");
so next we say if (this stuff) <0 br="" error="" function.="" so="" to="">we're binding our socket here if it fails we want to break out to our error function, we could have written:
ec = sockfd, (struct sockaddr *) & serv....... [so on]
if (ec < 0) { error(); }
but it takes a bit less space to combine it all on one line.]
so we're calling the bind function, this opens the socket and binds it to a port. we pass out serv_addr struct that contains all the data about the port and address etc to the bind function.
listen(sockfd,5);
Next we tell the socket to enter listen mode.
Now the socket is sitting patiently waiting for a client to make a connection.
Once a client connects, (as described in an earlier post) the client will have an address and a port for communications.
now we set-up a new socket for communication so that our existing socket can handover and continue to listen for new connections.
clilen = sizeof(cli_addr);
newsockfd = accept(sockfd,
(struct sockaddr *) &cli_addr,
&clilen);
just as we setup our listening socket we set-up our communication socket.
if (newsockfd < 0)
error("ERROR on accept");
and we check that it's opened properly, if not they we'll break out of the main routine to our error function.
n = write(newsockfd,"Hello",5);
Now we'll send the client a message.
again we say n = some function so that we can see what that function returned, zero or less is error.
if (n < 0) error("ERROR writing to socket");
which again means break out to the error routine.
finally we need to close the sockets, just as we close files when we're done reading and writing.
close(newsockfd);
close(sockfd);
return 0;
}
here's the whole code:
#include <stdio.h>
#include <stdlib.h>
#include <string.h>
#include <unistd.h>
#include <sys/types.h>
#include <sys/socket.h>
#include <netinet/in.h>
void error(const char *msg)
{
perror(msg);
exit(1);
}
int main()
{
int n, sockfd, newsockfd, portno;
socklen_t clilen;
struct sockaddr_in serv_addr, cli_addr;
sockfd = socket(AF_INET, SOCK_STREAM, 0);
if (sockfd < 0)
error("ERROR opening socket");
bzero((char *) &serv_addr, sizeof(serv_addr));
portno = 66;
serv_addr.sin_family = AF_INET;
serv_addr.sin_addr.s_addr = INADDR_ANY;
serv_addr.sin_port = htons(portno);
if (bind(sockfd, (struct sockaddr *) &serv_addr,
sizeof(serv_addr)) < 0)
error("ERROR on binding");
listen(sockfd,5);
clilen = sizeof(cli_addr);
newsockfd = accept(sockfd,
(struct sockaddr *) &cli_addr,
&clilen);
if (newsockfd < 0)
error("ERROR on accept");
n = write(newsockfd,"Hello",5);
if (n < 0) error("ERROR writing to socket");
close(newsockfd);
close(sockfd);
return 0;
}
when compiled on a linux system using gcc
(gcc -o server server.c)
a new binary file called server is created.
You should run this with the command ./server
(you may need to use sudo)
then you can connect to the server using telnet
c:\>telnet server 66
Trying 127.0.0.1...
Connected to localhost.
Escape character is '^]'.
HelloConnection closed by foreign host.
you can see that the server is working, it's listening, it's accepting connections, displaying the string, and then closing the socket. (just as it was programmed to do so!)
Monday, December 10, 2012


Monday, December 03, 2012
coding lesson: error codes
So I was expecting to be posting a lesson on how to make a server program that listens for a connection and then responds to a connection by sending a message to the client.
But in order to reduce the amount of code in that program first I'm going to introduce a way or outputting errors.
A program could fail in a few ways, I guess out of memory etc, but it can be difficult to trap those errors in a program, what's more the system knows what the error is, like I can't open a listening port because the port is already in use.
So to trap these errors and report useful information we use a call to a function found in a standard header file:
The standard header is stdlib.h that is included in the same way as stdio.h
then we are able to call a function called perror, tell it how we want to message to start, then the function will add what the system knows the error as, and print that to the screen.
#include <stdio.h>
#include <stdlib.h>
int main()
{
perror("error_one");
printf(\r\n"program running");
return 0;
}
when this program runs it prints the error message (no error) then prints a message to say that the program is still running.
Some errors are going to mean that we just can't go on. For example in the
creation of a server program that's going to listen on a network socket, if you can't create a socket, then the program is pretty useless and should terminate.
#include <stdio.h>
#include <stdlib.h>
void error(const char *msg)
{
perror(msg);
exit(1);
}
int main()
{
perror("error_one");
printf(\r\n"program running");
error("error_two");
printf(\r\n"program running");
return 0;
}
When this is run you can see that the message program running is only displayed once.
That's because when we call error there is a function called exit.
This does exactly what it says on the tin...
we can now call perror for non fatal errors saying hey you might want to fix this, any fatal errors now we can let the user know what's wrong and exist the program in a good way
But in order to reduce the amount of code in that program first I'm going to introduce a way or outputting errors.
A program could fail in a few ways, I guess out of memory etc, but it can be difficult to trap those errors in a program, what's more the system knows what the error is, like I can't open a listening port because the port is already in use.
So to trap these errors and report useful information we use a call to a function found in a standard header file:
The standard header is stdlib.h that is included in the same way as stdio.h
then we are able to call a function called perror, tell it how we want to message to start, then the function will add what the system knows the error as, and print that to the screen.
#include <stdio.h>
#include <stdlib.h>
int main()
{
perror("error_one");
printf(\r\n"program running");
return 0;
}
when this program runs it prints the error message (no error) then prints a message to say that the program is still running.
Some errors are going to mean that we just can't go on. For example in the
creation of a server program that's going to listen on a network socket, if you can't create a socket, then the program is pretty useless and should terminate.
#include <stdio.h>
#include <stdlib.h>
void error(const char *msg)
{
perror(msg);
exit(1);
}
int main()
{
perror("error_one");
printf(\r\n"program running");
error("error_two");
printf(\r\n"program running");
return 0;
}
When this is run you can see that the message program running is only displayed once.
That's because when we call error there is a function called exit.
This does exactly what it says on the tin...
we can now call perror for non fatal errors saying hey you might want to fix this, any fatal errors now we can let the user know what's wrong and exist the program in a good way
Monday, November 26, 2012
How to re-wind a nichrome wire hot end
Actually this is a pretty fast repair, my print stopped printing at about 10:30, and I was printing again by 1, certainly faster than waiting for a new hot end...
Anyway... here is the process, I thought I'd document the process as the only other hot end pictures I can find on solidoodles support forums are a resistor type, (in the hot to clear blocks thread) there is also mention of a 10Ohm resistor, and my machine appears to be different.
First, how to determine if your hot end isn't hot:
The first you'll probably notice that your extruder is in trouble is that you'll start getting a message appear saying "prevent cold extrusion" this is a limit built into the firmware, if the hot end temperature is below (or reported to be below) 170 degrees C the extruder won't function. that's because the ABS won't be melted, if you ran the extruder stepped at this temperature all that'd happen is the gear would stick, and wear a little grove into the filament, then it won't grip. then when the hot end does come up to temp, it won't be able to move the plastic, the plastic will spend too long inside the extruder hot end, then it'll burn and clog.
so you get the message that your hot end it's hot, have a look at the previous readings for temperature.
If the temperature has suddenly dropped from say 200 down to 0, then you should suspect the thermistor.
If the temperature has steadily declined, then you should suspect that the heater is broken.
Another quick and dirty way to test this would be to turn the heater off. monitor the temperature of the printer and apply an external heat source to the hot end, you should see the temperature rise. -if this happens you can confirm that the thermistor is OK, and it's the heater that's broken.
Having determined that your hot end is broken, you now need to figure out why.
Tools you'll need for this step is a multimeter.
start at the back of the machine,
look at the circuit board, at the bottom you should see two red connectors. you are interested in the one on the left hand side, (marked H in this picture).
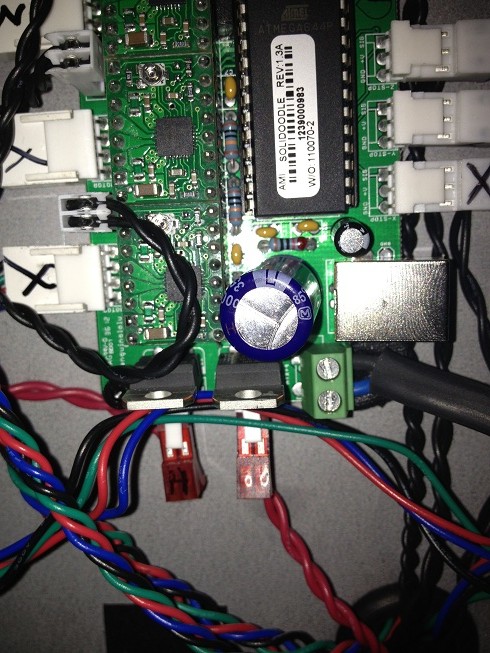
unplug that connector,
set your multimeter to read volts.
Tell the machine to turn the extruder on.
measure the voltage at the pins on the circuit board. you should get 12v.
if you don't get 12v, (and everything else in the machine is working), then you've got a problem with the main board.
If you do get 12v here, time to move on to the next step.
leave this cable unplugged, and unplug the hot end part of the extruder. (the red plug in the picture below)
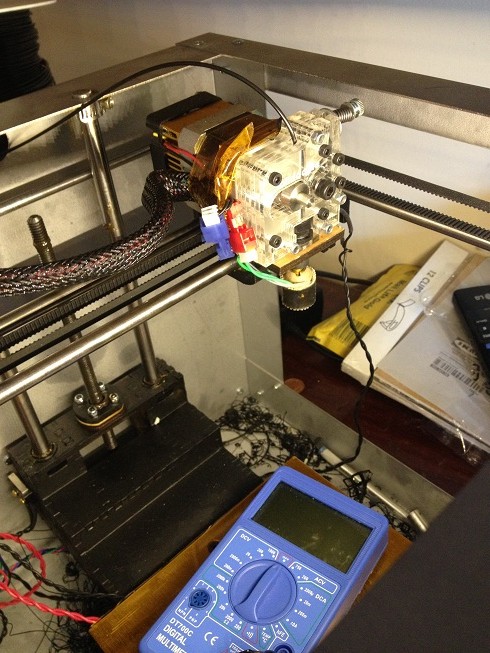
there are a few possible out comes here.
Main board connector 1 - hot end connector a = 0 ohms AND
Main board connector 1 - hot end connector b = infinite ohms
This is good. it means that the wire you're measuring is intact and fine.
now check the other wire in the same way.
if the results appear the same, (one wire no connection, the other wire 0 ohms resistance) then the main board to heater part of the set up is working fine.
other possible combinations are:
main board connector 1 - hot end connector a = 0ohms AND
main board connector 1 - hot end connector b = 0 ohms
this means that there is a short in the cable somewhere, perhaps it's been rubbing against the case and the insulation has worn and shorted.
and the last possible combination
main board connector 1 - hot end connector a = infinite ohms AND
main board connector 1 - hot end connector b = infinite ohms
these past two scenarios mean that you need a new cable to go between the main board and the heater.
Assuming that your main board is fine, and your cable is fine.
now check your heater element.
leaving your multimeter on ohms put one probe on each wire.
the hopeful result should be to read a low resistance. elsewhere on this forum, the figure is listed as ten ohms, however, it may also be 6 ohms. (depends on what you have)
anything much less than 6 ohms, implies that there is a short. anything much greater than ten ohm, (like the 16,000 Million ohms mine read) implies a broken wire somewhere.
if you have a broken heater, then you have two courses of action.
buy a new one, or fix your existing one.
fixing it is actually easier than you might imagine.
tools you will need.
A 2.5 mm hex wrench.
a soldering iron + solder
a craft knife/exacto knife
a roll of 1/4" (6mm) Kapton tape.
scissors (for cutting the tape)
1 adjustable spanner (or whatever size your nozzle is)
1 plumbers wrench, (those adjustable pliers type things)
1 length of nichrome wire.
the stock solidoodle uses AWG 31, (however you can change this for whatever you want).
(indeed I'm actually going to recommend changing this -I'll say why later -there are pro's and cons.
So,
Step 1.
cut the filament,
you already have the heater unplugged, now unplug the thermistor (blue) connector. the hot end has now been freed from it's ties.
Step 2
take the extruder assembly from the X carriage, (undo the two hex nuts from the read that go through the X carriage and emerge at two m3 bolts right near to the plastic (peek) part of the hot end.
Step 3
Take the extruder assembly, (the clear plastic part) off of the stepped motor, (the four hex bolts that are equally spaced around the motor.
Step 4 (you require some space here - unless you've taken the extruder apart before plenty of times and know how it goes back together)
Remove the bolt that secures the spring at the top.
place the bolt, small washer, spring, small washer and large washer in a neat row. (so you remember the order that they came apart in.
Next remove the bolt that holds the tension arm in, (your extruder will now only have two bolts holding it together.
carefully remove the nuts from the ends of these bolts, (don't pull out the bolts!!)
now, turn the extruder over.
remove the back piece, put this down on a table, remove the next piece, put this next to it.
remove the two broken pieces, (you'll know what I mean when you do this) and put them next to this. and the bolt that holds the tensioner.
then the two front pieces.
(methodical dissection, clear layout of how it came apart, also take photos if you like! will make it much easier to put this back together.)
you should now have the hot end free from the extruder assembly.
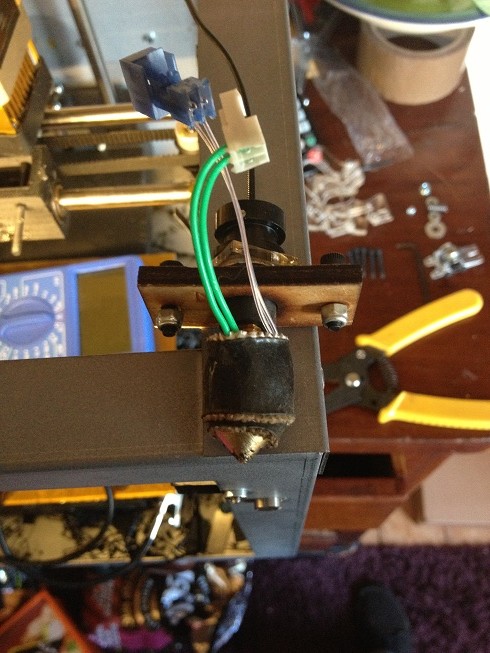
remove the black rubber insulators, (these should slide right off)
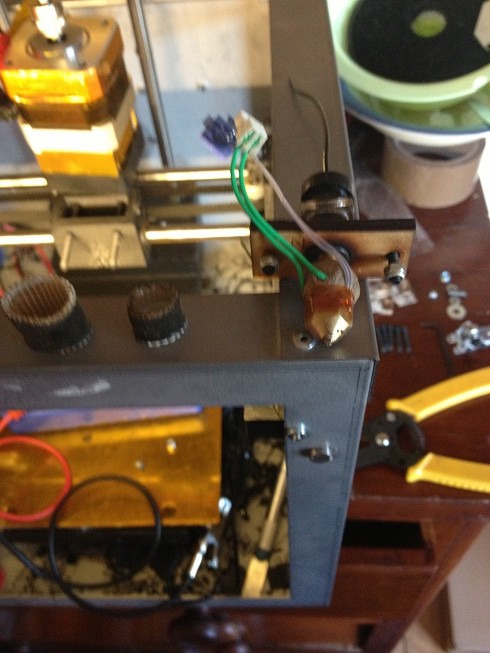
find the bulge in the nozzle bolt under the kapton, this is the thermistor.
rotate the hot end away from the thermistor and it's wires and use the craft knife to cut a slit in the kapton, then peel off the kapton and remove the thermistor.
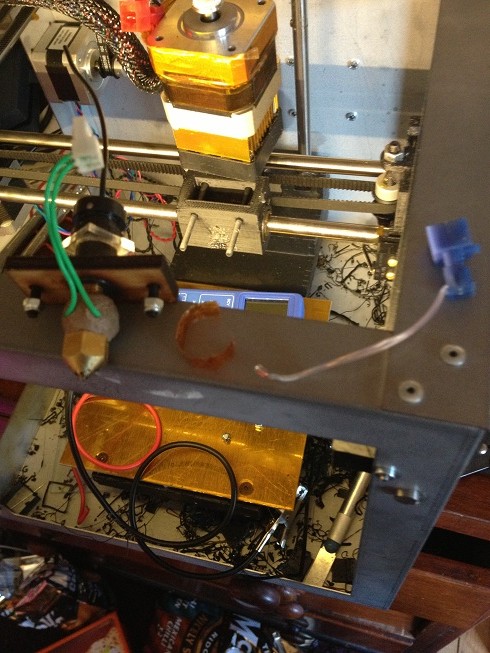
Now use the plumbers vice pipe grips to GENTLY grip the peek plastic, and the spanner to remove the nozzle.
if you find that the peek undoes, but the nozzle does not, then remove the peek, grip the brass pipe (CAREFULLY) and undo the hot end, then replace the peek.
After taking off the nozzle you should find that you can remove the heater element using your fingers.
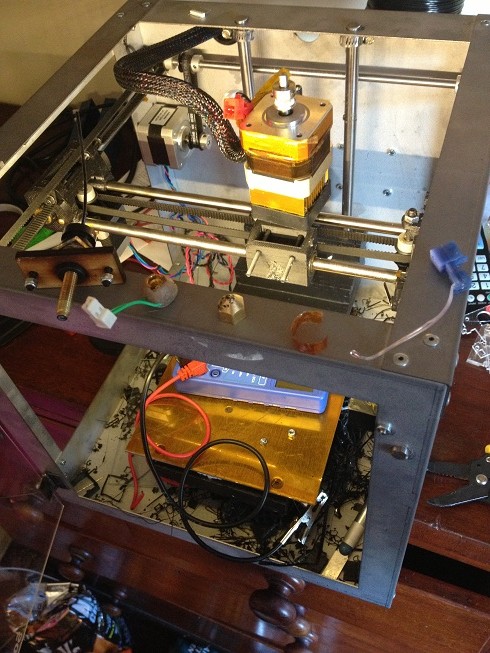
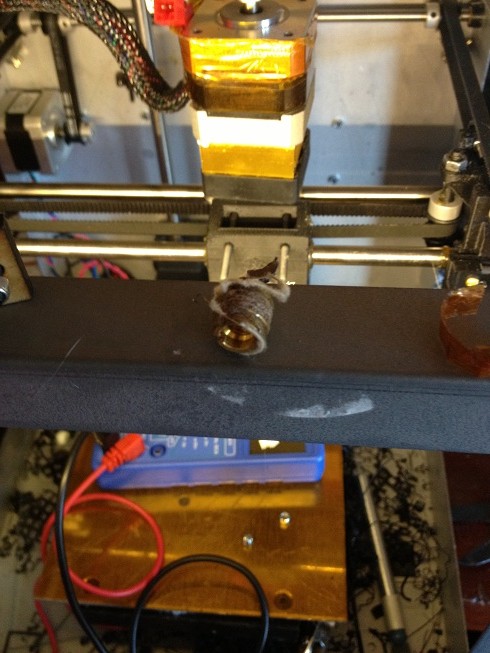
In order to get to the wires you need to remove the clay that keeps the wires in place.
I used the pipe grips to gently squeeze the clay, this caused it to crumble.
you'll be left with a threaded brass part, with furry wire wrapped around it, (the fur is the insulation)
now check the resistance of the wire, not from where the wires from the plug attach, but the actual resistance of the wire:
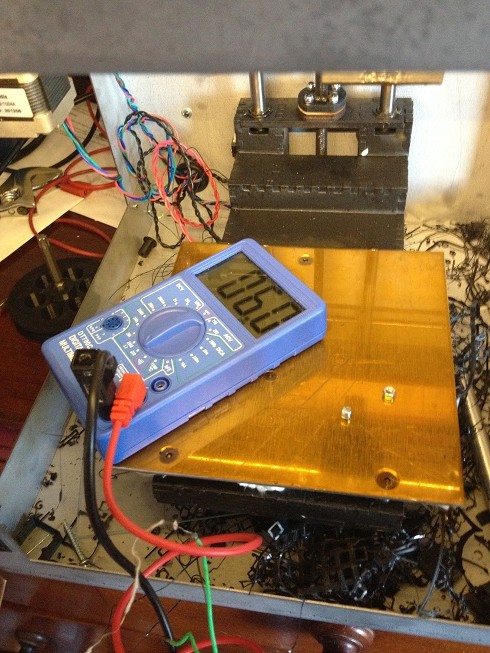
you see that the wire is intact, and measures 6 Ohms.
The fact that the wire is intact is a pretty good thing, and led me to believe that the best course of action was to re-wrap the heater barrel.
First, you'll see that the heater barrel is made of brass, (conductive) also that removing the clay has lead to a lot of that furry insulation material going AWOL. so wrap the barrel in Kapton.
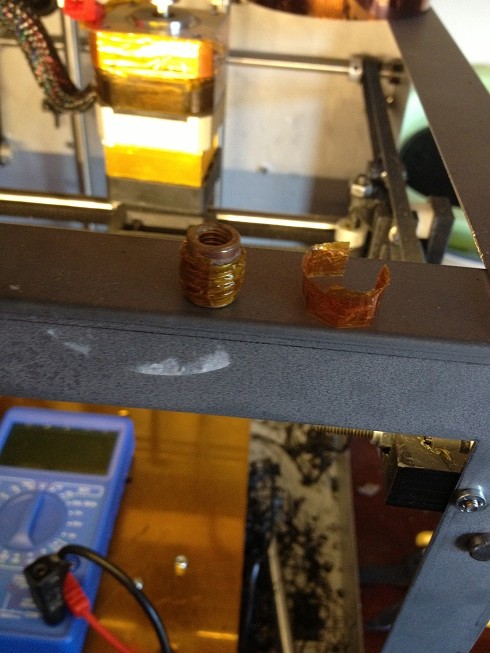
then starting at the top, wrap the barrel round and round pushing the wire into the threads to hold them a set distance apart, after the first complete wrap, (well three wraps is what it takes to go top to bottom, add a layer of kapton tape.
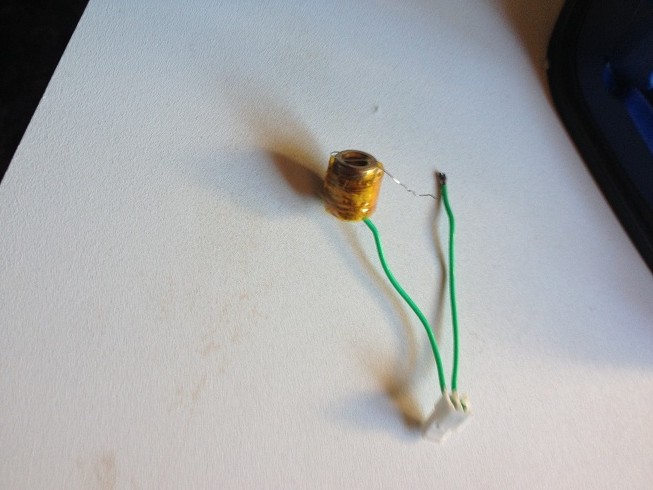
then continue wrapping.
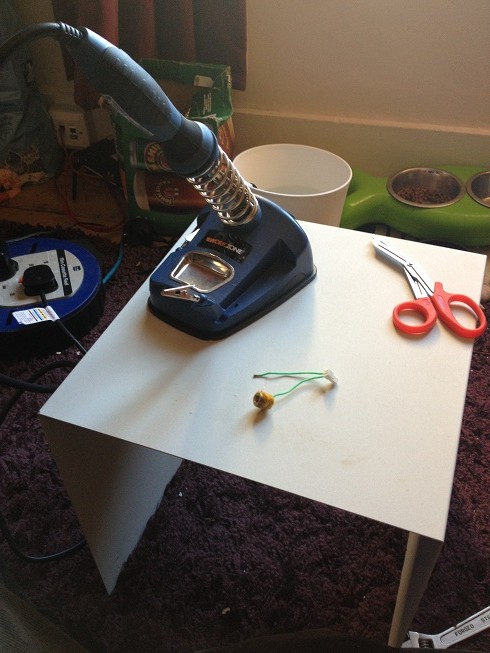
next solder the lead from your heater plug to the nichrome wire.
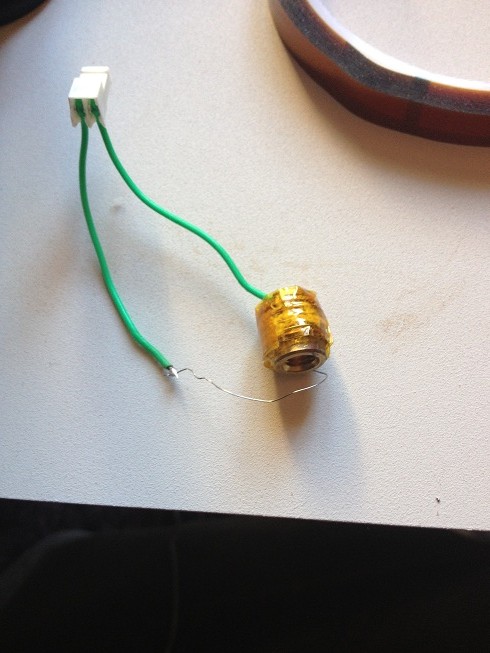
wrap the excess around the barrel and wrap in another layer of kapton tape.
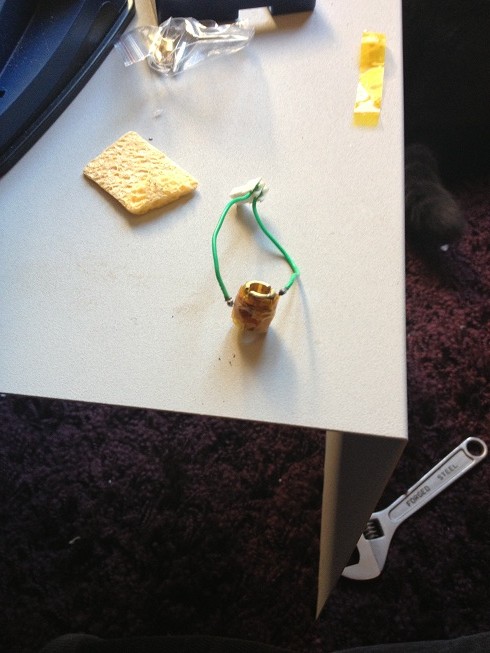
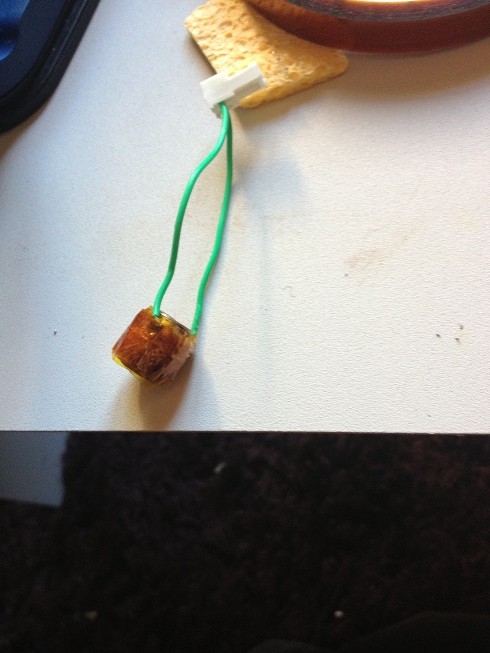
now, before you put it all back together, test the heater to make sure that you read the correct resistance:
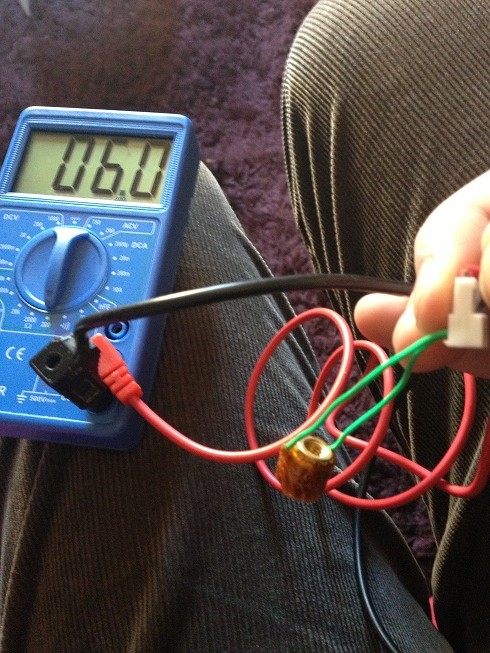
reassemble the heater/barrel/nozzle.
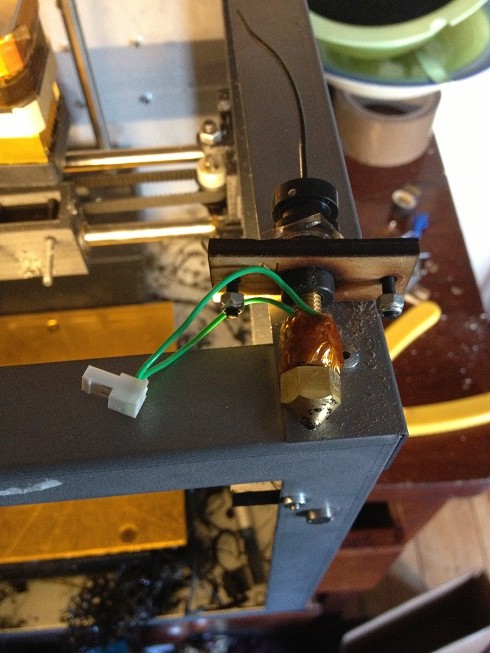
then tape the thermistor in place:
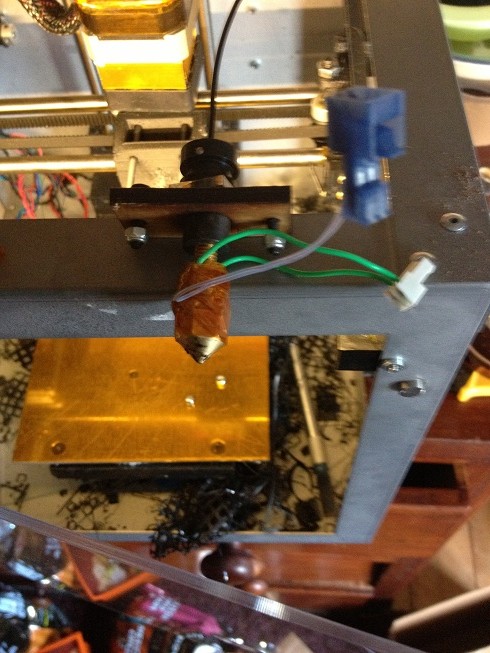
reattach the insulation:
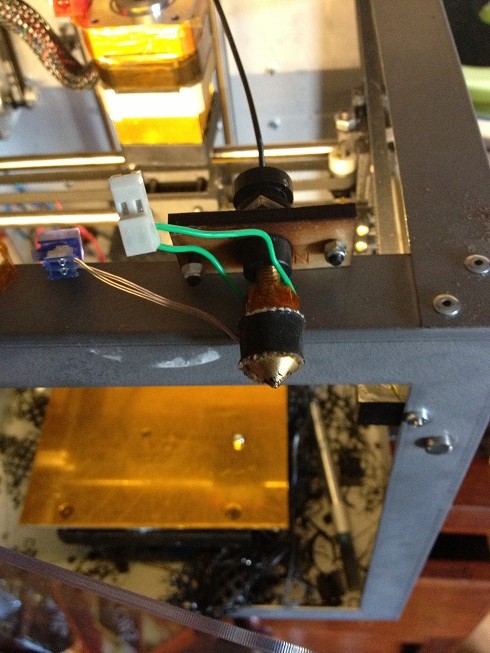
and test:
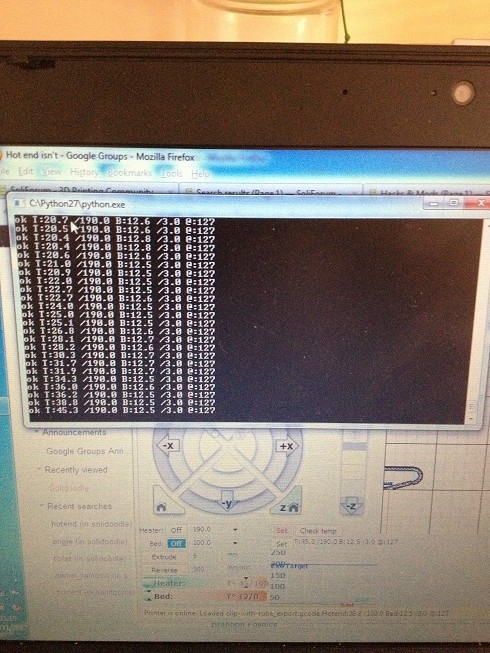
unfortunately, when I tested, the hot end got to about 70 degrees and then the solder joint failed again.
I have a feeling this is because the nichrome is heating to 1400 degrees, and melting the solder connection, so to fix this, I've decided that the wire should be fixed mechanically as well as soldered.
basically the end of the wire should cross over, then fold back and wrap around itself, forming two loops, (basically a variation of a linesman splice.) clearly using wire in wraps is going to reduce the length in the heater, and reduce the resistance, increase the power etc. so I decided that I needed to replace the whole thing
SO...
I had a length of AWG28 nichrome wire.
First, measure a 6ohm length of wire, (using a multimeter, unwind the wire and measure resistance along its length until it reads 6 Ohm.
then add a few cm for creating your wraps in the connection.
start by attaching the nichrome to the green heater connection wires. (splicing them with a loop and several wraps) then also solder.
then wrap the wire around the barrel, until three wraps are complete, add a wrap of insulating kapton, and wrap with wire again, then kapton, then wire, and so on until you reach the end of the wire.
when you're done wrap in a few wraps of kapton.
test the resistance to see that it's 6ohms, then reassemble the hot end as above:

I've left the joint poking out the top so that there is a gap between the solder and the heater.
(the nichrome wire heats up well past the point where solder melts, so the simple soldered lap joint, that is actually inside the clay just simply isn't good enough to last the test of time.)
finally test.
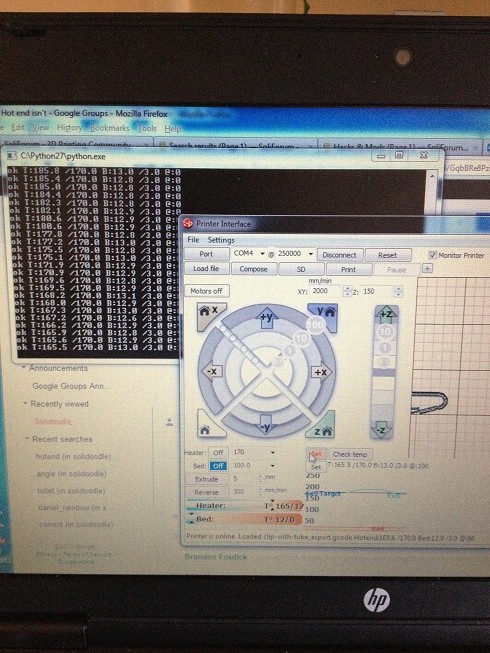
when testing increase the heat in small increments.
looking at this:
V = 12 R = 6 (so I = 2)
http://www.wiretron.com/nicrdat.html
gauge is 31.
heat in the nichrome = 1400 degrees C, (solder melts around 200)
my replacement heater actually runs cooler. (a mere 900 degrees C)
but there is more wire, (more heating mass), there is less to heat, (no clay = less to heat) so the time to heat to temperature is actually a lot shorter than the time to heat the stock nozzle.
Monday, November 19, 2012
Client / Server Software
In this post, I'm going to do a brief sort of how it works explanation for client server software.
The reason that I'm doing this is that the next coding lesson will be about creating network sockets on Unix/Linux systems in order to create network software.
There is (as ever) a lot of theory that goes into exactly how network connections etc work.
Rather that try to show horn all that into a single project I thought it'd be easier to post some theory first.
So first, we'll define what is a client, and what's a server.
A server in the context of network software is a program that listens for connections, accepts connections and serves content to those connections, (or receives content from those connections).
A client in the context of network software is a program that connects to another piece of software.
The server listens on specified ports awaiting connections,
The client connects to software that it listening on specified ports.
The network model layers
There is a standard for connecting systems, this is a 7 layer stack called the OSI model, (OSI is Open Systems Interconnection)
Each layer serves the layer above it.
This means that no higher numbered level can exist without the layer below it also existing.
(but you can have lower levels existing withough higher levels in your communication.)
The layers of the OSI model are very well documented elsewhere on the internet, it's a pretty broad subject, and I would suggest reading about it by searching for OSI model, It's practically impossible to break down to a simple blog post.
What is important is that the lessons that I'll be posting now will be using Layer 5 -the session layer of the OSI model. we'll be creating sockets that can be either TCP or UDP, telling the sockets what port we want them to listen on or what port we want them to connect to.
On top of the session level is the presentation layer, this presentation layer sorts out how the data is passed to and from the application layer (your web browser using HTTP) to the session layer (where the IP address is applied) and from there passed down to the transmission layer where it goes off into the world. the presentation layer may not always be used, but when it is used, it generally is used for compression or encryption, or translating between different character sets.
Because we will be accessing the OSI model at level 5 what you do at level six is up to you.
for example you could produce a fairly simple encryption protocol by bit shifting characters such that they appear as gibberish to anybody looking at the packets.
hello world >> ifmmp vlsme
then at the other end, your socket receives gibberish, at layer 5, then your presentation layer (layer 6) sorts that gibberish into real text by bit shifting the other way. and then this data is passed up to your next layer.
The application layer.
The application layer is where many common protocols sit. in general these protocols implement a way for your applications to request data from servers.
A web browser for example uses the HyperText Transfer Protocol.
this is a protocol, (an agreed standard) for the transmission of hyper text.
In general it works a bit like this (very simplistic)
you write https://www.google.com in your address bar.
your application layer passes to your presentation layer.
access www.google.com on port 80 and GET ./ (get the default page at this address)
The presentation layer receives this command, and because it's https (secure) it encrypts your request (GET ./). and passes it to the session layer.
The session layer opens a socket connection to www.google.com on port 80, and passes the data, (which is now encrypted -though the session layer doesn't care all it sees it's a data stream).
If we hadn't encrypted the data then the presentation layer wouldn't have been used at all.
Another thing that is important in these upcoming lessons is that this code will not be portable.
That is that the code will be platform specific, for windows or Linux/Unix systems.
The Linux/Unix software should work on Macs, and will work on raspberry pi devices, but will not work on windows, and the windows software will work on windows, but nothing else.
However the general theory for each is the same.
How socket connections work.
A socket is basically like a data stream, in the same way that we could read or write files, or print to the console using a data stream, we can read and write data to a network socket.
Your server listens on a port, (for a web server this may be port 80).
Your client software creates a port with a random port number, and connects to the server on the service port, it sends information about the port it will be listening on, and it's address
The server accepts the connection on the service port and creates a new port to reply from,
The server send a response from the new port to the client on the port that it established communication to the server on.
The client may then send a message, and the server will respond.
This will be more obvious when I get into the code, but that's going to happen another time.
The reason that I'm doing this is that the next coding lesson will be about creating network sockets on Unix/Linux systems in order to create network software.
There is (as ever) a lot of theory that goes into exactly how network connections etc work.
Rather that try to show horn all that into a single project I thought it'd be easier to post some theory first.
So first, we'll define what is a client, and what's a server.
A server in the context of network software is a program that listens for connections, accepts connections and serves content to those connections, (or receives content from those connections).
A client in the context of network software is a program that connects to another piece of software.
The server listens on specified ports awaiting connections,
The client connects to software that it listening on specified ports.
The network model layers
There is a standard for connecting systems, this is a 7 layer stack called the OSI model, (OSI is Open Systems Interconnection)
Each layer serves the layer above it.
This means that no higher numbered level can exist without the layer below it also existing.
(but you can have lower levels existing withough higher levels in your communication.)
The layers of the OSI model are very well documented elsewhere on the internet, it's a pretty broad subject, and I would suggest reading about it by searching for OSI model, It's practically impossible to break down to a simple blog post.
What is important is that the lessons that I'll be posting now will be using Layer 5 -the session layer of the OSI model. we'll be creating sockets that can be either TCP or UDP, telling the sockets what port we want them to listen on or what port we want them to connect to.
On top of the session level is the presentation layer, this presentation layer sorts out how the data is passed to and from the application layer (your web browser using HTTP) to the session layer (where the IP address is applied) and from there passed down to the transmission layer where it goes off into the world. the presentation layer may not always be used, but when it is used, it generally is used for compression or encryption, or translating between different character sets.
Because we will be accessing the OSI model at level 5 what you do at level six is up to you.
for example you could produce a fairly simple encryption protocol by bit shifting characters such that they appear as gibberish to anybody looking at the packets.
hello world >> ifmmp vlsme
then at the other end, your socket receives gibberish, at layer 5, then your presentation layer (layer 6) sorts that gibberish into real text by bit shifting the other way. and then this data is passed up to your next layer.
The application layer.
The application layer is where many common protocols sit. in general these protocols implement a way for your applications to request data from servers.
A web browser for example uses the HyperText Transfer Protocol.
this is a protocol, (an agreed standard) for the transmission of hyper text.
In general it works a bit like this (very simplistic)
you write https://www.google.com in your address bar.
your application layer passes to your presentation layer.
access www.google.com on port 80 and GET ./ (get the default page at this address)
The presentation layer receives this command, and because it's https (secure) it encrypts your request (GET ./). and passes it to the session layer.
The session layer opens a socket connection to www.google.com on port 80, and passes the data, (which is now encrypted -though the session layer doesn't care all it sees it's a data stream).
If we hadn't encrypted the data then the presentation layer wouldn't have been used at all.
Another thing that is important in these upcoming lessons is that this code will not be portable.
That is that the code will be platform specific, for windows or Linux/Unix systems.
The Linux/Unix software should work on Macs, and will work on raspberry pi devices, but will not work on windows, and the windows software will work on windows, but nothing else.
However the general theory for each is the same.
How socket connections work.
A socket is basically like a data stream, in the same way that we could read or write files, or print to the console using a data stream, we can read and write data to a network socket.
Your server listens on a port, (for a web server this may be port 80).
Your client software creates a port with a random port number, and connects to the server on the service port, it sends information about the port it will be listening on, and it's address
The server accepts the connection on the service port and creates a new port to reply from,
The server send a response from the new port to the client on the port that it established communication to the server on.
The client may then send a message, and the server will respond.
This will be more obvious when I get into the code, but that's going to happen another time.
Subscribe to:
Posts (Atom)