Showing posts with label the good life. Show all posts

Monday, May 13, 2013

Mass production, tooling, strategies and budgeting.

This blog could be titled, How to get it wrong.

I'll start with the story, then I'll point out the failings.

A few weeks ago I made a new heater for my solidoodle 3d printer, I was quite happy with the results, despite having broken a drill bit in my heater block, I got around that, and I decided that was my fault, I clearly wasn't drilling the hole straight, it was a small drill bit, and they often break anyway...

When I bought the aluminium bar to make the hot end I had decided that I would probably want to make something else anyway, so I got a 2 meter length.

After making that first hot end I decided that I was going to make and sell a whole load.
I had enough aluminium bar, I had bought a hundred heaters at the start of the project, (knowing that I could sell the heater elements on their own!)

So I started cutting up that long bar of aluminium into 100 small pieces.
by about the 3rd piece I gave up and went to ebay and bought a small hobby band saw. -this worked great for cutting the aluminium, right up until the blade broke -though this had come with the saw, (which only cost £30), and had made 99 cuts, -failing on the last)

After this I got my set square and scribe and marked out where I needed to drill holes on all 100 blocks that I had cut. then I centre punched them. -this is time consuming, that was 600 holes that I marked!

After this was done I decided that I'd start drilling, rather than drilling by hand I decided that I'd use my fathers pillar drill, a Draper tool, I dutifully loaded the drill bit into the chuck, and set about drilling holes, I started by drilling 2.5mm hole through all of the holes I'd marked, a lot of the holes needed to be 2.5mm, others would benefit from a pilot hole being drilled anyway.

However I found that on the point where the hole for holing the thermistor met the hole for the screw securing the thermistor, the drill bit would catch and break. this was the same problem I'd had with the hand drill, but now I was getting this with a machine drill, one that was square, level and had no lateral forces, clearly there was a problem with the way that the cut was being made, swarf from the hole was catching and causing the bits to break at an alarming rate.

Eventually I managed to get a few holes drilled carefully that did meet, (afterwards I bought some 2.5mm end mills that I would use in the drill to make these holes meet more successfully!

At the end of the time I had set aside that day I had 11 pieces half made, I had the holes for the thermistor set-up drilled successfully, and the long hole through the block pilot drilled. at this point I'd been at it around two hours, and decided that was enough... -and besides the drill had gotten quite warm and I thought it could use a rest!

One morning the following week I decided that I'd continue my project. however within ten minutes of starting the drill the motor had caught fire.

In the end I took the pieces home and finished the first batch with a hand drill.

I tapped them and installed the heater elements.
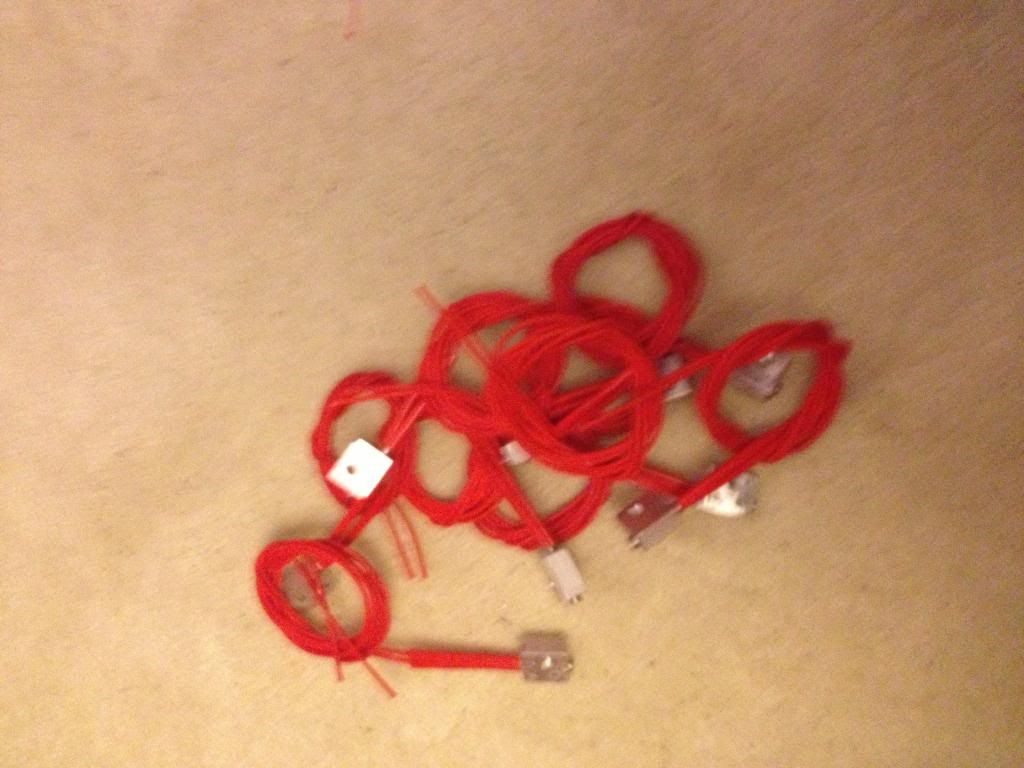
As it's a new month I've been paid and gotten some more money to spend on this project I've now ordered the thermistors, wire and heat shrink to finish these heaters up.


So... let's look at where I went wrong.
First, I'm hoping to sell these for around £12 - £14, this is in line with what others have sold for on Ebay.

the heaters were £130 + £15 import VAT for 100
Aluminium bar was £10
Thermistors are£70 for 100
heat shrink is £5 for the 6m of 1mm heat shrink I need
and £3 for the 5m of 3mm heat shrink I need.
wire is around £2 for 10 meters, (and I need 200meters) so £40
the grub screws cost around £15

So a quick sum up looks like I'm nearly £250 in the hole with materials.

Postage on each item is expected to be around £1. (so that's another £100)
Ebay will take ~£2 per item, (£200)
and pay pal will also want their 10% (£1.40 per item, times 100 = £140)

so that'll be around £700 of costs.
I'm hoping to sell these for a total of £1400

but here's where the problem starts....

now take roughly 25% of that away in taxation and national insurance that I'll need to declare. that's £175, leaving £525

Trying to do this cheaply has meant that I broke around £5 of drill bits whilst trying to make the blocks, and that £10 saw blade for the band saw.
(leaving £510)
I'd busted my dads pillar drill, because it's a hobby tool, not an industrial tool, it's meant to spend about 30 seconds being on, then have ten minutes to cool down, now spend nearly three hours in constant use, so that it over heats, and breaks down the insulation, (and then catches fire)
a complete replacement is around £300, second hand maybe £150, or a new motor will be around £100
My "profit" is now a pretty shabby £400...
then I spend a couple of hours cutting up the aluminium bar, a few more hours in front of the drill, a couple of hours sourcing materials, I'll conservatively spend probably 15 minutes per item with listing on ebay, talking to buyers, packaging and going to the post office to actually post the things.
(that's 1500 minutes, or about 30 more hours). I spend around an hour designing the thing in the first place.

Based on the initial ten I have that's 6 hours of machining and making,
So that 100 will be about 60 hours of machining, plus 30 hours of listing and posting.

So that £400 I've got remaining will need to pay for about 100 hours work. about 2/3rds minimum wage.

in other words.
I started out thinking, cool, the parts for this will make me loads of money, I'll spend about £2.50 on an item that I can sell for £14.

But,
using hobby tools has increased costs due to breakages.
Using hobby tools has meant that I can't work for more than an hour at a time without significant machine downtime to cool off, increasing the amount of time take to produce parts.
Funding this venture myself has meant that I've had to wait until pay day to get more funding. - I could have taken this to a kikstart project, but them I'd have 100 angry customers breathing down my neck saying that my lack of planning or prep wasn't their fault, and where is their money etc.


The long and the short of it is:
before you decide that you want to give up your day job and live the dream of running a tech startup. do your sums first. be realistic.
I was wishfully thinking that I might get around £700 for what would be an easy day stood at a band saw and a drill. -actually I was thinking I could use an ordinary hack saw to do this work!

What I though would be around £100 per hour I'll retired a millionaire next week, has actually resulted in being a drain on time and resources. Maybe with a few thousand pounds of investment for industrial tooling I'd do better -but I doubt that also!

Monday, January 21, 2013

Making a coat stand for a child

So I thought it was about time I finally wrote up the build of a coat stand that I made, (about 2 years ago).

The idea for this coat stand was sent to me by my friend who said I should make one for my daughter. I forget the exact link to the inspiration, but I do remember it was on Ana Whites website called "Knock off Wood, free woodworking plans for furniture http://ana-white.com/"

If you have a few days you should definitely check out that site, it's chock full of amazing furniture, includes plans.

You don't have to follow the plans, you can be like me and decide to make your own plans up in your head to build approximate versions of stuff on the site.

Anyway, now that I've covered where the idea came from it seems only right to give a little background.

Design
At the time I made this coat stand my daughter was about 3, she was getting to an age when you should care about your stuff, and start hanging up your coat etc, but not yet at an age where she could reach regular height coat hooks.

So the solution was obviously to build her a coat stand more suited for her.

This means that it should have pegs reachable by a 3 year old who stands about 3 feet tall, (so the height of the stand is about 4 feet, so she'd have to reach up at the start, but would not immediatly outgrown the stand.

I decided that the coat stand would need four pegs that would be at her current arm height that she could hand coats on, and a further 4 hat stand type pegs, to put hats on of course. As she grew the hat stand pegs would eventually become coat pegs.

So the parameters for design are:
four coat pegs, at about 3 feet from the ground, four hat pegs about 1 foot above the coat pegs, a stable base is a must.


Materials,
I decided that I'd use softwood to make this coat stand, it's easy to work with, and has a variety of finishing options from plain no finish, or varnish, to any colour as it's easy to paint.

The pegs I decided would be made of dowel. (12mm dowel so that they would not easily snap)

To build with nice proportions of 12mm diameter dowel pegs I decided that 48mm square pine was the best wood to use.


Onto the build
So the biggest gripe I had with the materials was the condition that it was in. I bought square planed timber from Wickes, this should be ready to go. if I'd bought rough sawn wood I'd agree that imperfections were ok.

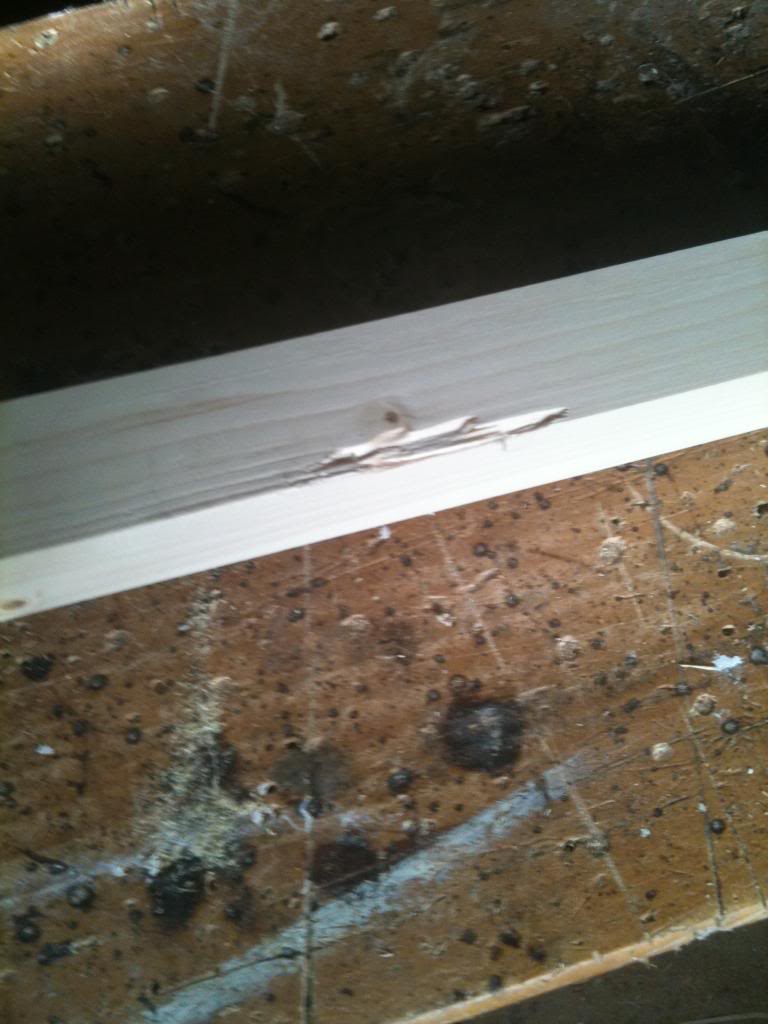
So the first job was to inspect your materials and work out what I could do to cut out imperfections. like this:

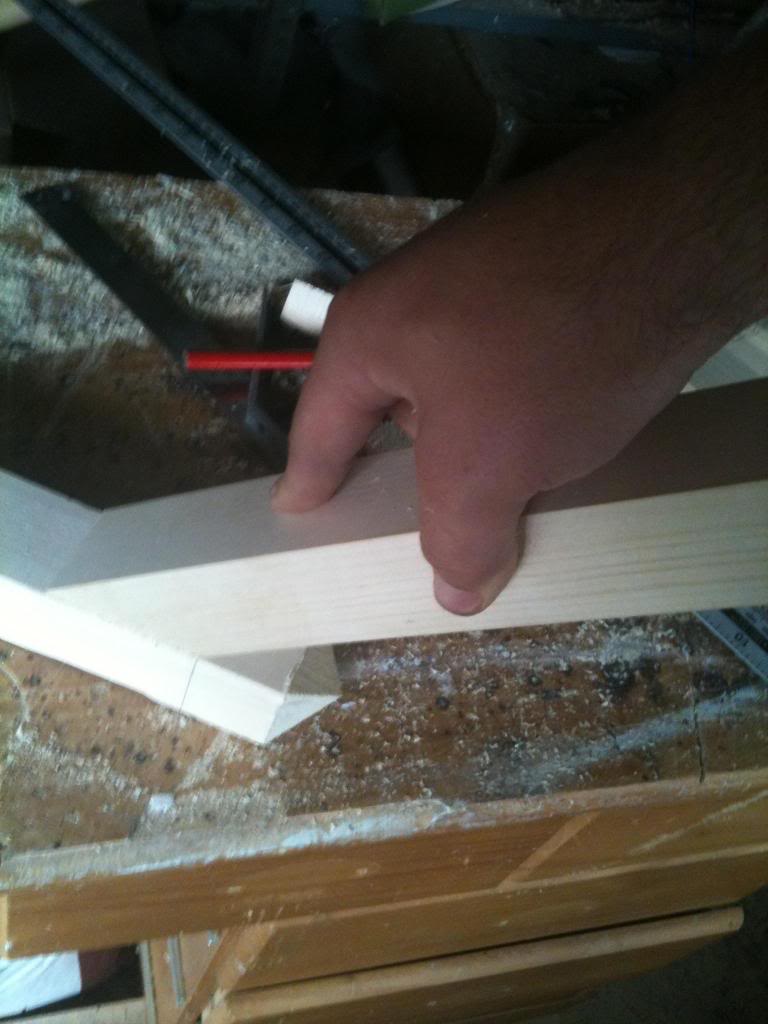
Once I'd decided the best cuts for the wood (and there is no exact science for this that I'm aware of) I started cutting, setting the blade of my saw to 45 degrees I made a cut around 14 inches down the length of the wood.
then set the blade back to 90 degrees to make the next cut again about 14 inches down the length of wood.
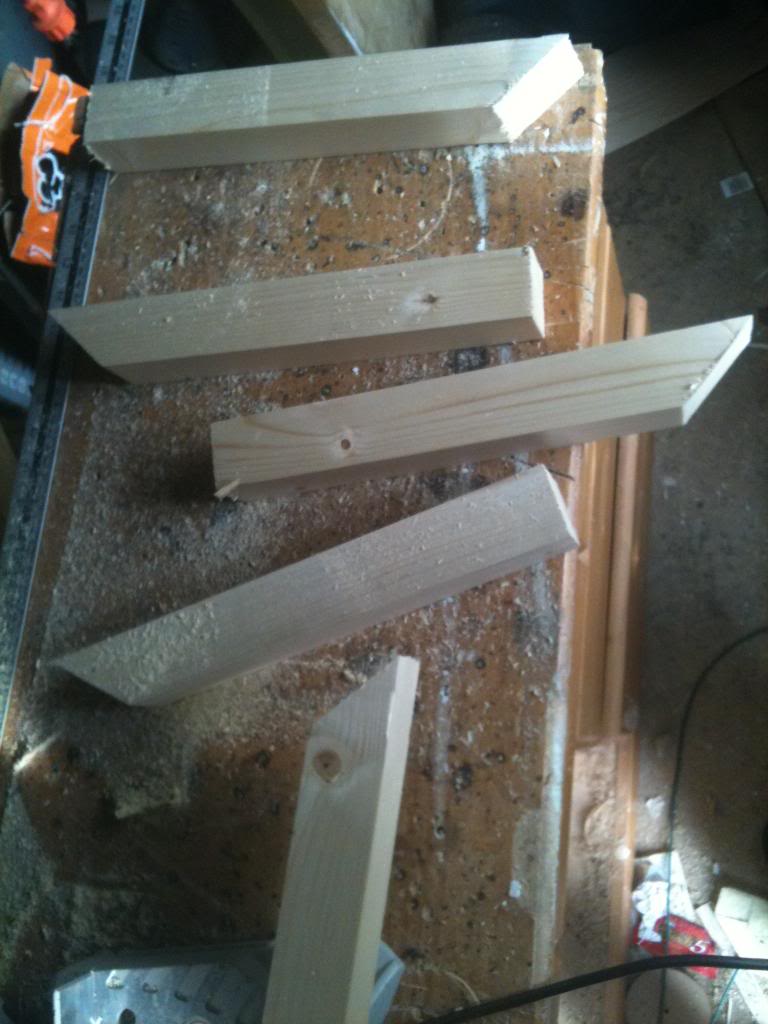
This will gave me two bits of wood, with one square cut end, and the other end cut at 45 degrees.

Repeating the above gave me four of these. these will be the legs of the coat stand.


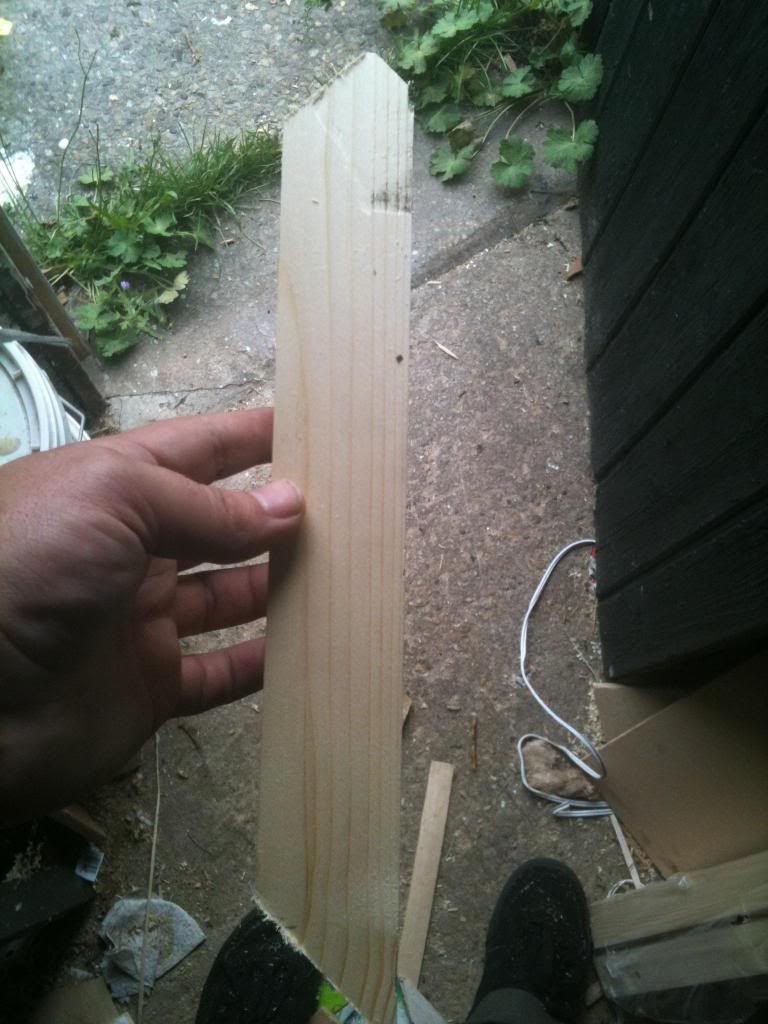
Next I made a 45 degree cut in the remaining (approximately 1 meter) length of wood.
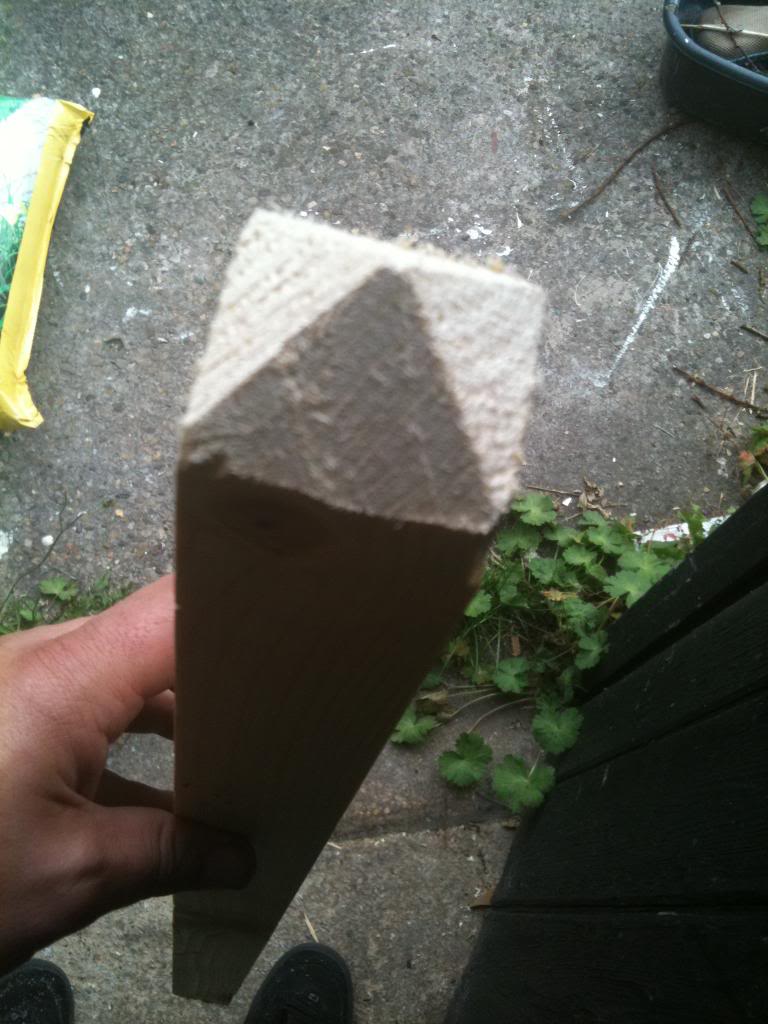
Then flipped it over and made another 45 degree cut, then 2 more cuts and I had a square point.

I did this at the top and the bottom


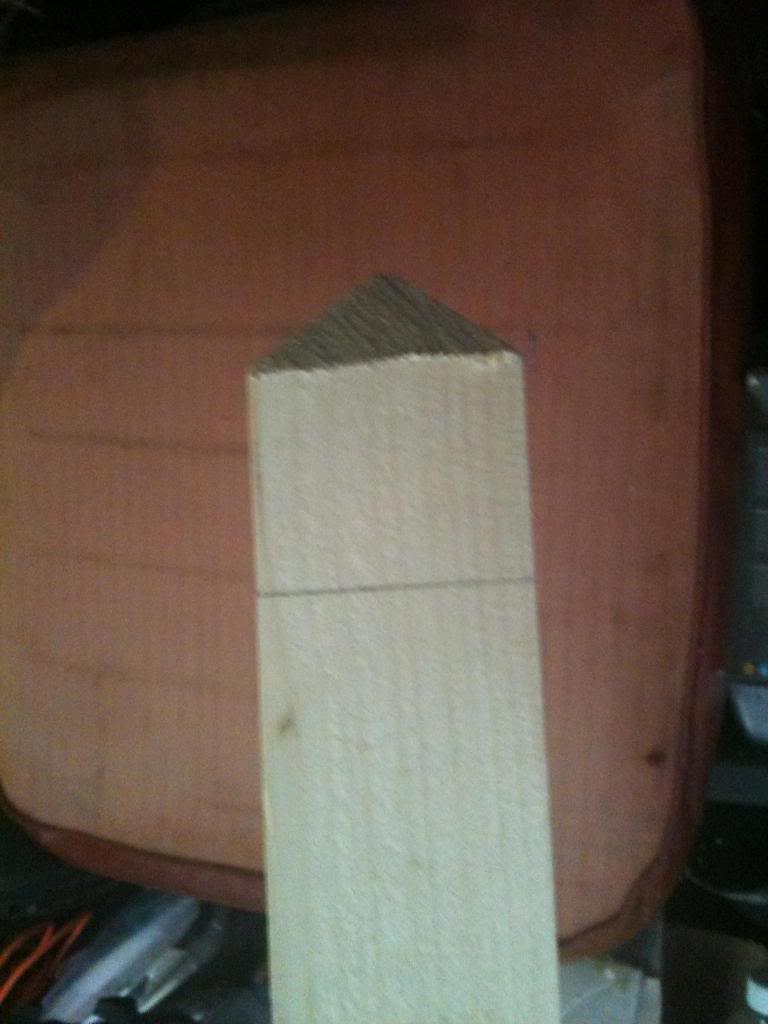
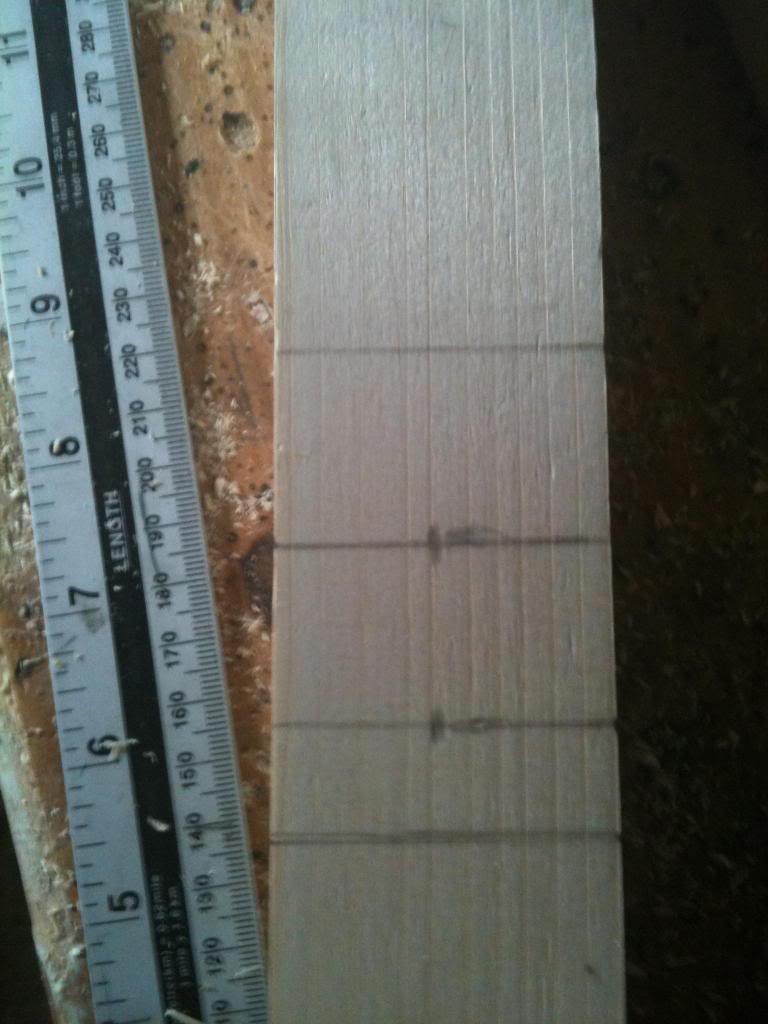
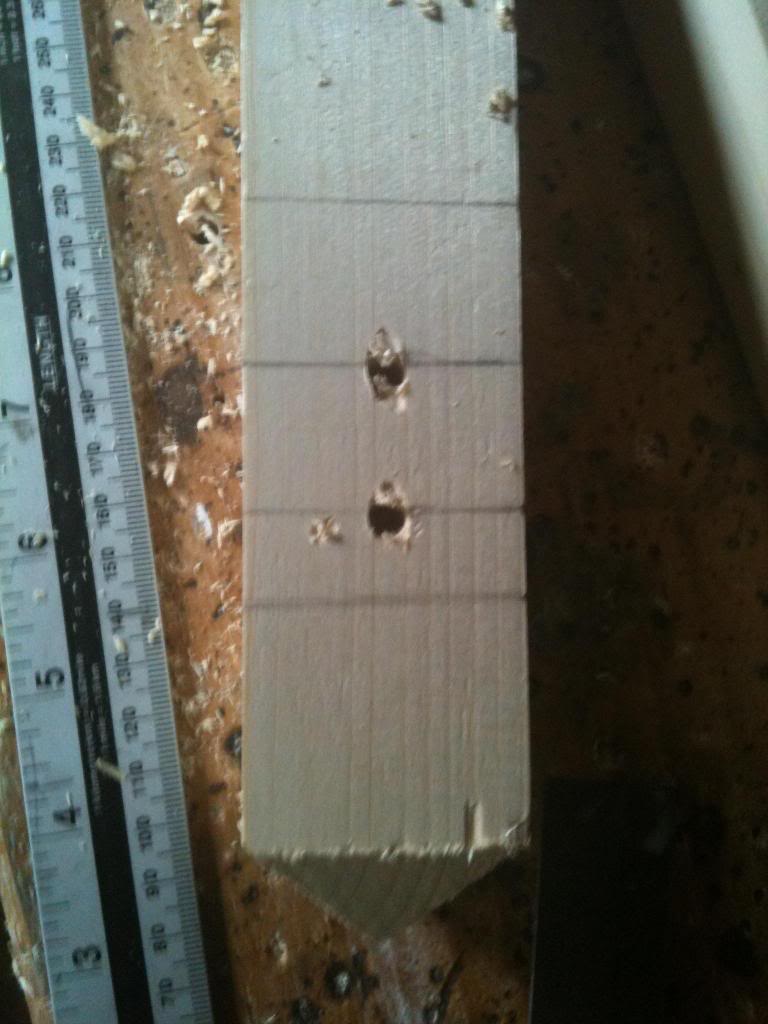
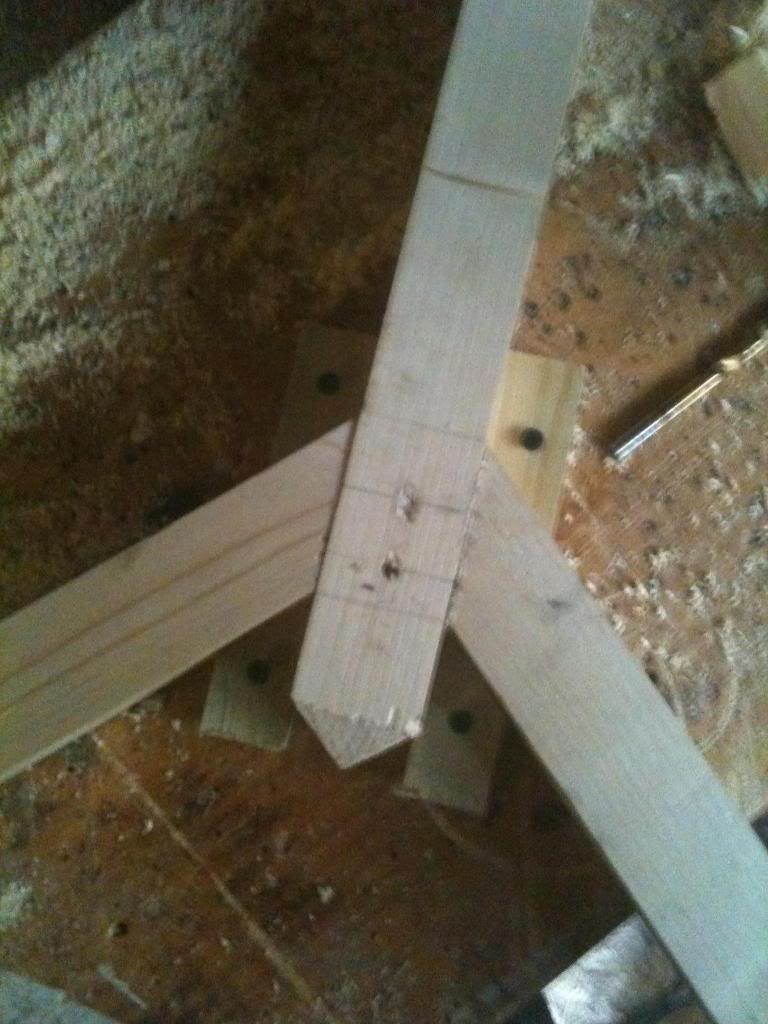
Next I marked a ring about 1.5 inches from the bottom of the base of the point, this is where the legs will attach.


And a further ring about a half inch above that, (and another about an inch after that)


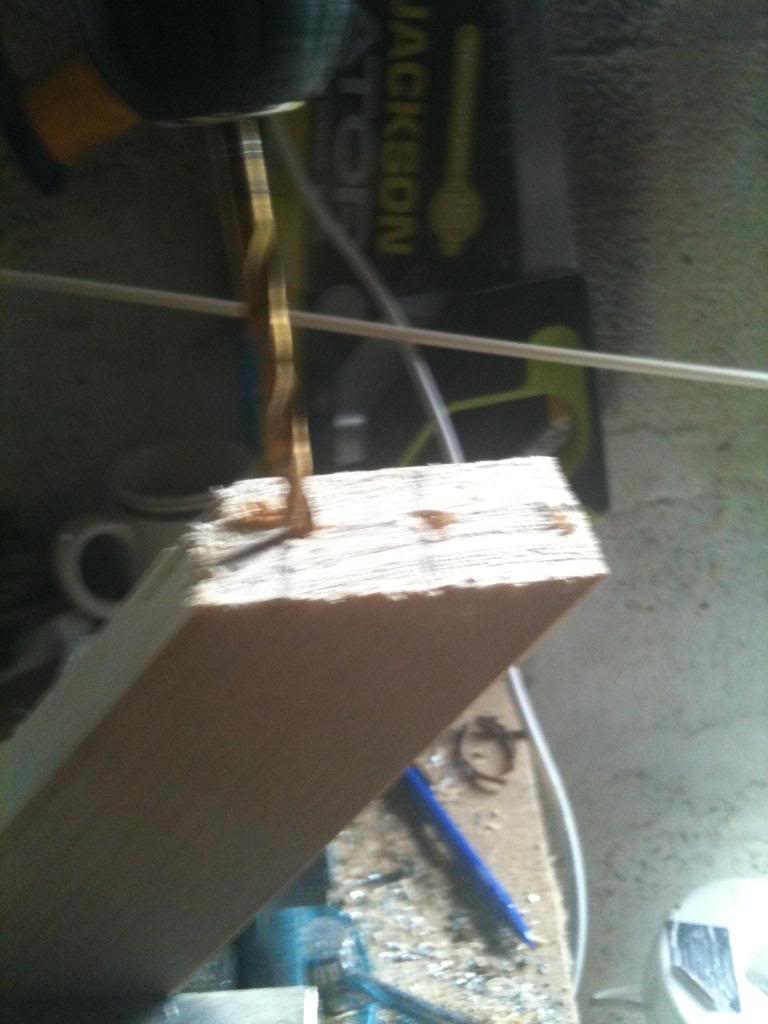
The centre of these lines are drilled with a 6mm drill bit, (ready to recieve a dowel peg to make a strong joint)


 Back to the legs.

Clearly the 45 degree cut is what will butt against the centre poll that I've been busy marking and drilling and making pointy.

But the legs do need some further work, and the moment the base will be the corner of the block of wood.

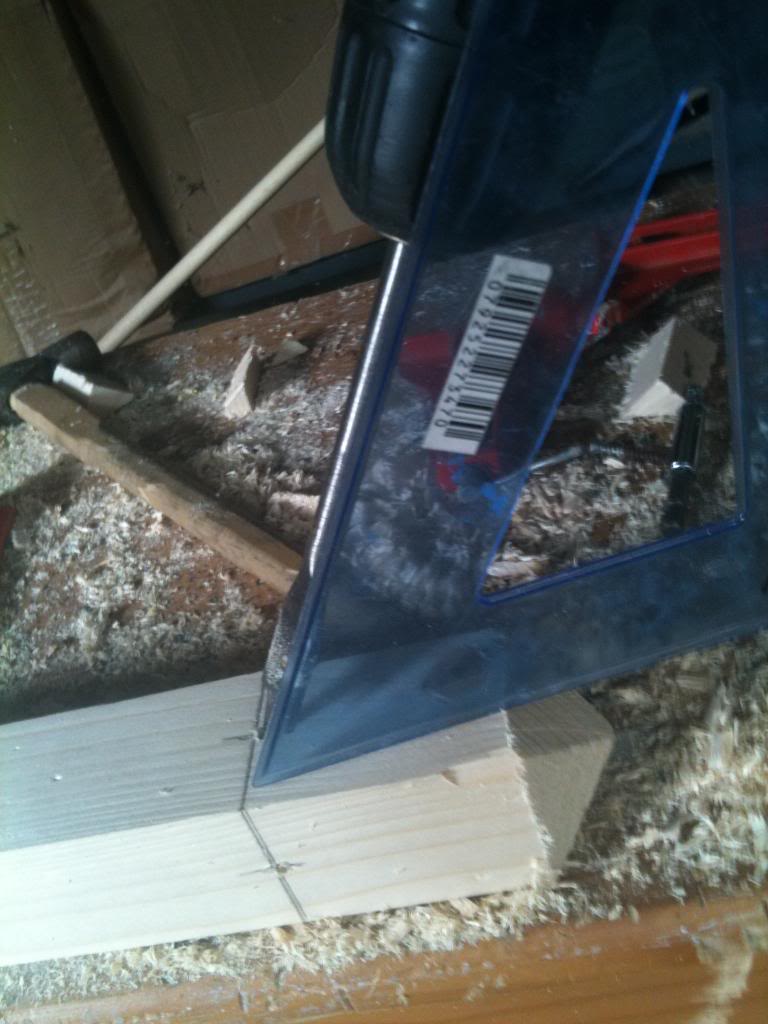
so I set my saw back to 45 degrees and cut an angle in the opposing direction to the mitre that will face the centre poll, then I cut again to smooth off the top of the leg.


I now marked and drilled the long mitred face of the leg, to recieve dowel pegs and glue.


Now I did a dry test of matching the joints (A dry test is where you put it all together without glue, this allows you to make any final adjustments before it's too late!!)


Finally I put dowel pegs and glue on the joint.
I set the first two joints against a table using wooden blocks screwed to the top to clamp it in position.
The final two legs were arranged with the blocks clamped to the centre stand, then the leg clamped to the blocks, (allowing the odd angled leg to be clamped to the stand)


Finally I drilled 12mm holes in the stand at about 4 feet from the floor. a hole going straight through, and another hole about an inch higher going through the other way.

Then I glued an 8 inch length of dowel into the holes, (with 3" sticking out of either side")

The hat pegs were drilled into the top of the stand, (about an inch and a half from the top, so the pegs are about as far along the centre poll as the legs are up it).

I don't have a drill press with a moveable table so I used a set square, and roughly lined the drill up to drill coat pegs at an angle into the top of the stand.


Lengths of 12mm dowel we then glued into these holes.

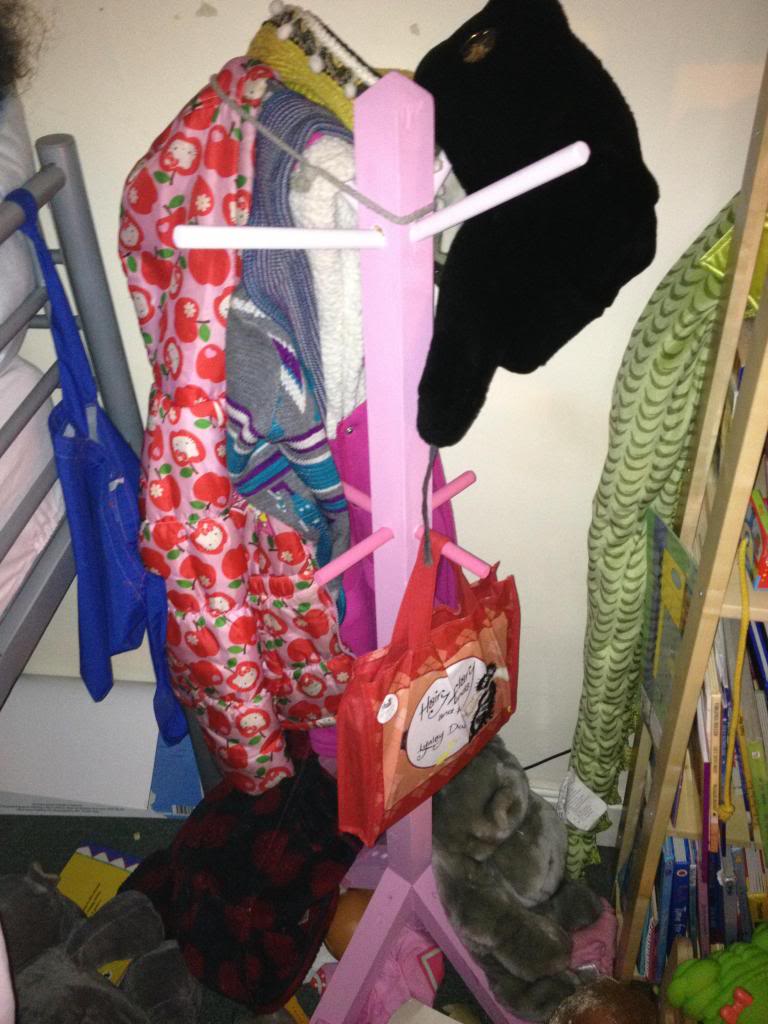
Finally the coat stand was painted a pastle pink colour.


Thursday, August 25, 2011

Insulating Jacket for water storage tank.

We're having a nice hot summer, so I'll admit that I did this a while ago, but have only just gotten around to posting it.

It's all this comparing water to electricity that's made me remember this.

The trouble was this,
I live in a shared house, and something was a little wrong with our gas bill.

It seems a bit weird to say that really. the problem went unchecked for quite a while, because being a rented house we had this knackered old boiler (that one day was found to be unsafe and replaced by a new boiler).

But our gas utility bills still stayed really high, this was in January, and it's been snowing, so we'd been inside the house a lot, and had our heating on a fair bit, we'd had hot water that filled up our hot water tank, and the water was set to always be hot.
For January our gas bill came in at £260 for the month.
The fact that there are 4 adults in my house made this bill manageable, but it was not comfortable to be spending that much on utilities especially since the house was always freezing!

That bill was a bit of a wake up call. Honestly, we'd known that the house was full of drafts, (you only had to stand a few feet away from a door to feel the cold air), but being as it was a rented house we didn't really want to be the ones to pay for fitting draft excluders, but that month we realised that we were actually paying more for not fitting draft exclusion strips around the doors.

Solving the problem
So we made a quick trip to the shops, we bought several packs of the very thin brush strips that have self adhesive backing and go round the doors.
These were applied to the frame of the exterior (outside doors) and the next door in from those, (so the strip was applied to the back door that leads into the kitchen, and around the kitchen door that leads into the rest of the house.

We also bought draft excluder brushes to go at the bottom of the doors, we attached these to the front and back (exterior) doors, and the effect was immediate!
Not only did the house feel warmer straight away, but by the time we got a bill for February we'd saved over £100 on our gas bill.

Still, something wasn't quite right though.
Through march the weather actually got warmer so we were able to run the heating off completely, and still our gas bill didn't really change. we'd assumed that because our radiators were pretty old and knackered, that we were running a boiler really hard to try to heat the house and that's what was taking up all the gas and costing us loads each month.

So next we looked up at the hot water tank.
In our bid to reduce energy we'd decided that we didn't need hot water 24x7, we just needed hot water in the morning and evening to shower and to clean dishes etc. so we used the timer on the boiler to tell it to heat the water twice a day.

We were noticing that when the water was set to come on though (when the water in the tank dropped below a certain temperature, and at 4 in the afternoon) that it was always coming on, and the cupboard that the tank was in was always very hot.

It was soon clear that the problem here was that the tank wasn't very well insulated at all.

The Tank
The tank was an old copper tank, that when bought did not have any insulation at all, (unlike modern tanks that are covered in expanded foam) someone had once upon a time tried to insulate the tank a little, wrapping some small red fibreglass filled pads around it and tying them on with string.
The trouble with these were that the fibreglass was only about an inch thick, and the largest pad was 1' x 2' so this patchwork of pads was terribly inefficient.

Another trip to the DIY store and we came home with a large roll of loft insulation, these rolls are about 4ft tall, and 15ft long, the cost of the roll was about £5.

It's not strictly just fibreglass, it's a fibreglass/sheep wool mix.


We unrolled the insulation, (don't be fooled by it's tight packaging when you unravel it it expands and is about 4 - 6" thick!) after unrolling the insulation we placed am old double duvet cover on top and cut to the size of the duvet cover.

Then we put the fibre glass insulation into the duvet cover and wrapped it round the tank, and tied it in place, the very top of the tank was capped off using the little red pads that has previously covered the entire tank.


Sadly, I don't have a before photo (and I'm not going to rip out all that work to get one!
What I do have though is before and after bills.

January - £260
February - £145 (this is the insulation improvements, the weather was still cold and nothing else changed.)
March - £90 (the weather improved and the heating went off leaving only hot water.)
April - £30 (the water tank insulation really made a difference.)

Now we didn't ask the landlords permission to make these changes, not even for the draft excluder strips that are screwed to the door. You may like to do that, we took that rather more risky approach of saying, when you rent a house you're always meant to leave it in the same or better condition as when you moved in, and we've drastically improved this house.

To be honest we're feeling a little stupid that we didn't do this a lot earlier now!
we're burning less gas, we're spending less money, and we're just as warm, if not more warm and comfortable in our house now than we were before.

And all of this took just two trips to the DIY store (though that could have been 1)

Cost

old duvet cover - free
Insulation £5
draft excluder stips (frame ones) x4 £20
draft excluder brushes x2 £10

£35, seriously that's all £35 and an evenings work to fit everything. and we saved far more than that in the first month before we'd even finished the job.

Tuesday, September 29, 2009

A Raised bed for vegetables

A few weekends ago I was at a friends house, in fact the friend who first inspired me to start an on-line blog. A keen gardened they were fed up with the slugs constantly "getting" their produce, and no amount of rings of slug pellets seemed to be helping. After a walk around the Wyvale garden centre in Bicester, and stopping at the kids activity play area there so that the little one could have a nice afternoon playing with all the toys and in the balls pits an such we'd decided that what was needed was a raised bed to grow vegetables in, high enough off the ground to keep out all the slugs and snails, at a nice working height to reduce the amount of grovelling on the floor to do gardening.

A quick trip to B&Q later and we had all the tools and materials to do the job. In the best tradition of just having an idea and going for it, we made no plans, just a few rough guesses in our heads whilst wandering round the shop. here is what we came up with...

We'd need a box, with a broad base, that was raised off the ground on legs, the box would clearly need sides, and some form of lining to keep the soil in. all the materials would have to travel home in a small hatchback, (A Peugeot 205). from previous experience, I knew that I could fit long lengths of wood into this car, running from the passenger foot well through to the boot, where it would literally just touch the glass of the rear window.

we looked in the plain timber section, and things were staring to look quite expensive, at first the outside of the box was going to be made with tongue and groove boards, (until we realised how much these would cost). almost giving up the idea there and then we made a quick trip to the outside part of the DIY shop to have a look at fencing supplies. we left the shop with a pack of fence boards, a long thick piece of wood and 2 much smaller pieces of wood. along with a small selection of tools.

Materials:

1 thick piece of wood, (this can be any size you like, I believe that we used about 1.5" (38mm) x 2" (47mm) thickness, with a length of 2.4 meters).
about £5

3 thinner pieces pieces of wood, the thickness for these was much thinner, but basically ou should find it sold as roofing baton, and it should be about 1" (25mm) x 3/4" (19mm), again 2.4 meters long.
about £1.50 each (£4.50)

a pack of ten treated feather edge boards, (fencing boards). these are 10cm high, and 2.4 meters long, their profile has a taper in them.
about £11

1 disposable (plastic) decorators dust sheet. (12 foot x 12 foot)
about £1

a pack of 250 screws -you don't need 250, just it's a convenient size to buy!
about £8

total amount to build this is: about £30.
quite a lot less than the hundreds that the garden centre had wanted.

We also bough a pack of screws and a saw.


we had an idea of rough dimensions in the shop, these were finalised at home (all in the head) and then the saw came out.

the long thick piece of wood was cut into 4 60cm long lengths to become the legs.
the feather edge boards and the roofing baton were cut in half to 1 meter 20 cm sections.


now came the putting it together part.


take the four legs, and attach the baton to the inside edge of the legs, creating a 1.2m x 1.2m square, that should be able to stand on it's own.

this is how:

I affixed the first baton to the two legs of one side about 25cm from the top,
then repeated this, so I had two sides,
I used two screws through each piece of baton so that it would stand steady. you may wish to pre-drill the holes, I didn't and the wood did split a little bit.

I took these two sides and put them opposite each other with the baton facing inwards, I then laid a baton across the other baton and screwed it to the leg, and repeated on the other side.

The four legs are now attached with four pieces of baton, making a 1.2m x 1.2m square and all the baton is on the inside.
It's important that the baton ends meet the edge of the leg as that makes the frame 1.2m in width and length, this is also the length of the boards that were going to clad the outside.

Now I started to clad the outside of the frame in the feather edge boards.

to do this I started at the top, put the thin edge of the board towards the top and affix to the frame with a single screw near to the top, (again pre drilling holes will prevent splitting the wood).
when the board was attached on one side, I then moved on to attach it to the other side. This meant that I could line up both sides with the top the single screw acted as a pivot to hold the board whilst attaching the other side.

after attaching the first board, I gently lifted the bottom edge of this and slid the thin edge of the next board underneath, and screwed the board down, again with one screw in each end of the board near to the top of the board. After affixing the first two boards, I put the third board in place, in the same way.
Now all the boards were clad on one side, held in with one screw near to the top of the board, next I put a second screw closer up the to the bottom of the boards, this makes the frame stronger, if I had put two screws into each board I wouldn't have been able to lift up the board above to slot the lower board under.
this makes the rain run off a little better, and makes it all look a little nicer.

(repeat for the other three sides).

now you've got a substantial sized box with nice looking board clad sides,

you should have 2 x 1.2m lengths of baton remaining. put these into the box so that the sit on the lower level of the baton. this should split the box into thirds, and mean that you have two batons at each side screwed into the legs of the raised bed. and two batons in the middle, resting on batons that are screwed into the legs of the raised bed.

you should also notice that you have 8 x 1.2 meter lengths of feather edge board remaining.
lay these boards onto the four baton to form a base. You should evenly space the boards
the gaps between them will be important for drainage.

Congratulations you've built your raised bed.

if you're wondering how long it took. then probably about 2 - 3 hours to cut all the wood and put it together.

The following weekend we filled the raised bed.
before filling the raised bed we (I needed help for this!) took the decorators dust sheet, unfolded it into it's full 12 foot x 12 foot size, then folded it into quarters.

The cheap dust sheets have the thickness of a cheap sandwich bag, so folded into four it has the thickness of 4 cheap sandwich bags, which is more than enough to stop the soil falling through the holes in the slats that make up the base.

The dust sheet was laid into the raised bed frame and was stapled to the frame.

the frame was then loaded with dirt.

you should find that the raised bed, (assuming that you followed these instructions) is about 1.2m 1.2m and has a depth of about 25cm.

1 litre is a volume of space that is 10cm x 10cm x 10cm, why do I say this? because compost comes sold in litres, and you're going to need to figure out how many litres of soil you want in this.

In case you're wondering the total capacity would be 360 litres of soil.


a separate trip to B&Q found that compost seems to cost about 7.5 pence per litre, grow bags cost 3.5 pence per litre. grow bags are meant for growing veg in, so clearly we bought grow bags.
I chose to get seven grow bags, (this is 231 litres of soil -they come in 33 litre bags).

this fills the raised bed to a little over half way, providing a soil depth of around 12cm, this is an ample amount to grow vegetables like lettuce, onions, garlic etc, and provides free space of the top of the raised bed to which you can attach either plastic sheet -to keep the frost off in the winter, or mesh netting to keep the birds away in the spring.